
This Millennium Supreme T2 review is both a review and a full walkthrough. I will cover everything in the manual, plus the things the manual leaves out. By the end, you will know exactly how to set up this board, connect it to Lichess or Chess.com, save your games, and keep it running for years. Thanks to my friends at the Chesshouse for sending one to me for testing.
Here is my short verdict. The Millennium Supreme T2 is the best-built electronic chessboard I have used. It is also expensive, and it does not play chess by itself. If you understand that going in, you will love it.
Let’s dig in.
What Is the Millennium Supreme T2?
The Millennium Supreme T2 is a tournament-size electronic chessboard made of real wood. It has RFID piece recognition, a built-in rechargeable battery, and Bluetooth. That last part matters. Older Millennium boards needed a separate ChessLink module to go wireless. The T2 has everything inside the board.
One thing the manual never says clearly, so I will: the Millennium Supreme T2 has no built-in chess engine. It cannot play against you on its own. It is a smart board, not a chess computer. To play, you connect it to a phone, tablet, PC, or one of Millennium’s chess computer modules. Keep that in mind for the rest of this review.
What’s in the Box
- The electronic chessboard with RFID piece recognition
- A set of wooden chess pieces with 2 extra queens (depending on the model you buy)
- A USB-C to USB-C cable, 2 meters long
- A USB-C to USB-A adapter for older computers
- The user manual
Note what is missing. There is no power adapter in the box. Any standard USB charger works, as long as it outputs at least 0.5A. Almost any phone charger from the last decade will do. I would grab one you already own instead of buying anything new.
Key Specs at a Glance
| Spec | Detail |
|---|---|
|
|
|
|
|
|
|
|
|
|
|
|
|
|
|
|
That 48 scans per second number is worth noting. The DGT Bluetooth board scans 6 times per second. In practice, the Millennium Supreme T2 registers moves instantly, even in blitz. I never had a move hang.
Step 1: Charge the Board First
Charge the board fully before your first game. Plug the included USB-C cable into the port on the right side of the board and connect it to any USB charger.
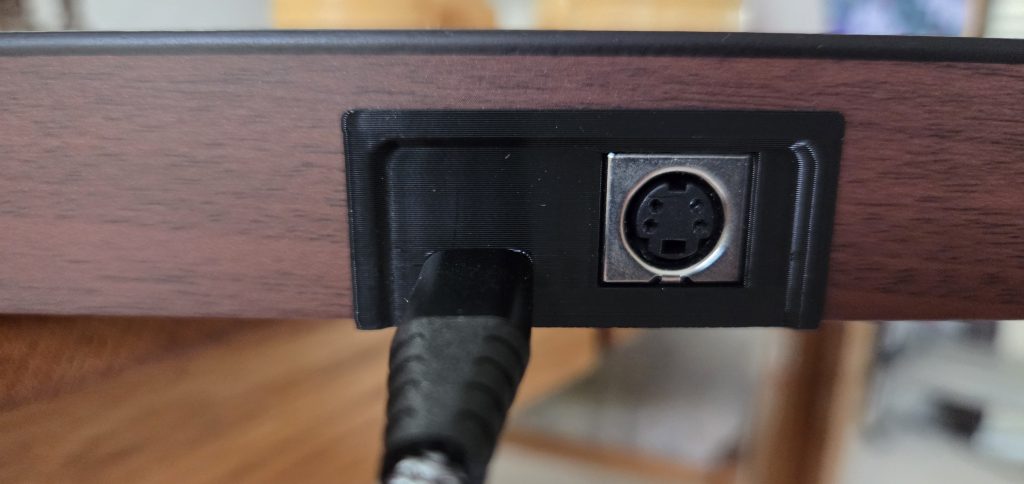
Here is the part that trips people up. The board only charges when the slide switch is set to Bluetooth or USB. In the DIN position, the board gets power but the battery does not charge. Millennium did this on purpose to protect the battery. But if your switch is on DIN and the battery never fills, the board is not broken. Just flip the switch.
The charging LED stays lit while charging. When it turns off, you are done. A full charge takes about 6 hours. The light may flicker on and off near the end. That is normal.
When you switch the board on, the 9 LEDs along the bottom edge show the charge level. All 9 lit means full. One LED means nearly empty.
Reading the Battery Level
During play, watch the power LED:
Slow flashing: about 60 minutes of play left
Fast flashing: plug it in now
You can charge while playing in Bluetooth or USB mode. A power bank works fine for this. I keep one nearby for long sessions.
Step 2: Learn the Buttons

The control panel sits on the edge of the board. From left to right:
- Bluetooth pairing button. Press this to put the board in pairing mode. The slide switch must be on Bluetooth first.
- Bluetooth LED. Steady light means connected. Flashing means pairing mode.
- Slide switch. This picks your data source. Bluetooth for wireless, USB-C for a cabled PC connection, Mini-DIN for chess computer modules.
- PGN button. Press this to transfer stored games to a PC.
- Brightness button. Adjusts the 81 board LEDs.
- Charging LED. Lit while charging.
- Reset button. Restores factory settings.
- Power LED. Shows the board is on. Flashing means low battery.
- On/Off button. Turns the unit off and on.
My one complaint: The buttons are small. They work, but they feel like an afterthought on a board this nice.
Step 3: Connect via Bluetooth
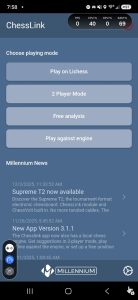
Bluetooth is the main way most people will use this board. Here is the process with the free Millennium ChessLink app that you will need to download from the app store:
- Turn on the Millennium Supreme T2.
- Set the slide switch to Bluetooth.
- Open the ChessLink app on your phone or tablet.
- Make sure Bluetooth is on and all app permissions are granted.
- Press the Bluetooth pairing button on the board (#1 on the graphic above).
- Tap the connection icon in the app.
- Tap “Search for board” and wait.
- When your board appears, tap it to connect.
If the Board Won’t Connect
Nine times out of ten, the board is already connected to something else. It can only talk to one device at a time. Close the chess app on your other phone or tablet, then try again. After the first successful pairing, the app reconnects automatically the next time you open it.
Step 4: Connect via USB
For a wired PC connection, set the slide switch to USB and connect the cable. Use the included USB-C to USB-A adapter if your computer has older ports.
You may need the FTDI Virtual COM Port driver. Windows usually installs it on its own. If not, grab it free from the FTDI website. The board shows up as a virtual COM port, which is how chess programs talk to it.
A nice bonus: the board charges while connected over USB. Even a dead battery will not stop you from playing a wired game.
Which PC Software Works with the T2?
The manual points you to Millennium’s compatible apps list and stops there. Here is my more useful version. These programs work with the Millennium Supreme T2 on a computer:
- Lucas Chess. Free, and the easiest starting point. Install the Millennium driver option and you are playing engines in minutes.
- Arena. Free and classic, though the setup is fiddlier.
- Fritz / ChessBase. The premium choice if you already live in the ChessBase world.
- HIARCS Chess Explorer. Excellent on both PC and Mac.
- ChessConnect (My recommendation). A Chrome extension that links the board to websites. More on this below.
Playing on Lichess and Chess.com: Which Mode Do I Use?
This deserves its own section because the manual barely touches it, and it is the first thing most buyers want to do.
Neither Lichess nor Chess.com natively supports a USB chessboard. You always need a bridge.
For Lichess, use Bluetooth and the ChessLink app. This is the smoothest path and most common. The app connects your board to the Lichess server. You will need a free Lichess API token. In the app, follow the token setup: log into Lichess, open API Access Tokens, create one, and enable every option except “Play games with the bot API.” Copy the token carefully. The letter O and zero look alike, and so do lowercase L and capital I. If your token fails, just make a new one.
Once logged in, you get quick games, custom challenges, games against friends, the Lichess engine at levels 1 through 8, and even Arena and Swiss tournaments. Moves show on the board through the LEDs. It works well.
The video below from ChessHouse explains this nicelyl.
ChessLink Is Not Built for PC. Here Is What to Use Instead.
This trips up a lot of new Millennium Supreme T2 owners. The official ChessLink app only runs on Android and iOS. There is no Windows version. There is no Mac version. If you plug your board into a computer with the USB cable and go looking for a Millennium desktop app, you will not find one.
That is not a dead end. It just means you need a different tool. That tool is ChessConnect.
What Is ChessConnect?
ChessConnect is a free Chrome browser extension built by Dr. Jörn Gehring. It is not made by Millennium, but Millennium officially recommends it and lists it on their compatible apps page. Millennium’s own testing team even verifies new versions before release. Here is a video from their website:
The extension does one job. It connects your physical board to chess.com, Lichess and Chessiverse inside your browser. Once connected, every move you make on the Millennium Supreme T2 shows up on the site. Every move your opponent makes lights up on your board’s LEDs.
Because it runs in the browser, it works on Windows, Mac, Linux, and ChromeOS. Any Chromium-based browser will do. Chrome is the obvious choice, but Microsoft Edge works too.
Setting Up ChessConnect with the USB Cable
Here is the full walkthrough from a cold start.
Step 1: Install the FTDI driver (Windows only). The Millennium Supreme T2 shows up as a virtual COM port on your PC. Windows sometimes needs the FTDI VCP driver to see it. Download it from ftdichip.com/drivers/vcp-drivers. Mac users can usually skip this step.
Step 2: Install the extension. Open the Chrome Web Store and search for “ChessConnect.” Look for the small satellite dish icon. Click Add to Chrome.
Step 3: Pin the icon. Click the puzzle piece in your browser toolbar. Pin ChessConnect so the satellite dish is always visible. You will use it to change settings.
Step 4: Set the connection method. Click the ChessConnect icon and open the options. Set the connection method to “USB serial.” This tells the extension to look for your cabled board instead of scanning for Bluetooth.
Step 5: Prep the board. Slide the input switch on the Supreme Millennium T2 to the USB position. Connect the USB-C cable to the board and your computer. Turn the board on. As a bonus, the board charges while it is plugged in, so battery life is a non-issue in this mode.
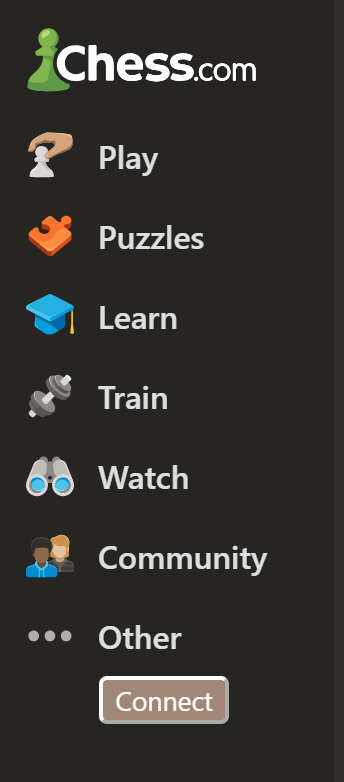
Step 6: Connect and play. Go to chess.com or lichess.org. You will see a new Connect button on the page. Click it, select your board, and set up your pieces in the starting position. Start a game. Your moves now flow both ways.
Why ChessConnect Is Worth It
It unlocks chess.com. This is the big one. Lichess has an open API, so several apps support it. Chess.com does not offer native e-board support for Millennium hardware. ChessConnect is the bridge that makes it work, and it supports the full site. Live games, bots, and tournaments all work.
It plays nice with cheat detection. Some board bridge solutions trigger chess.com’s fair play systems because of how they input moves. ChessConnect is built to avoid this, and user reports back that up. Your account stays safe.
USB means zero connection drops. Bluetooth is convenient, but a cable is bulletproof. For rated games where a dropped connection costs you the point, USB is the way to go.
Quality-of-life features. ChessConnect can announce your opponent’s moves with sound or voice output. That means you can keep your eyes on the board instead of glancing at the screen. It also auto-detects whether your cable exits left or right, so board orientation sorts itself out.
An adjustable delay setting. The extension waits a moment before sending your move, so sliding a piece across squares does not register as a wrong move. Users report that 75ms is a sweet spot for USB play. If moves are registering before you finish them, raise it. If the board feels sluggish, lower it.
One Note on Bluetooth Mode
ChessConnect can also connect over Bluetooth LE if you want to skip the cable. On some setups you first need to enable two Chrome flags. Paste these into your address bar and enable both:
- chrome://flags/#enable-experimental-web-platform-features
- chrome://flags/#enable-web-bluetooth-new-permissions-backend
Then restart the browser. If Bluetooth gives you trouble, switch back to USB. In my testing, the cable is the more reliable option, and it charges the board at the same time.
The Bottom Line on PC Play
Think of it this way. ChessLink is your mobile solution for Lichess. ChessConnect is your desktop solution for both Lichess and chess.com. Between the two, the Millennium Supreme T2 covers every major way people play online chess. Millennium just does not spell this out clearly in the box, which is exactly why this guide exists.
For Chess.com, use USB and the ChessConnect Chrome extension. Chess.com has no open board API, so Millennium cannot build direct support. ChessConnect bridges the gap in your browser. It also works with Lichess, which makes it the most flexible single option if you play on a PC.
So the simple rule is this.
Phone or tablet on Lichess: Bluetooth with the Chesslink app shown above.
Desktop/laptop on Chess.com or Lichess: USB with ChessConnect.
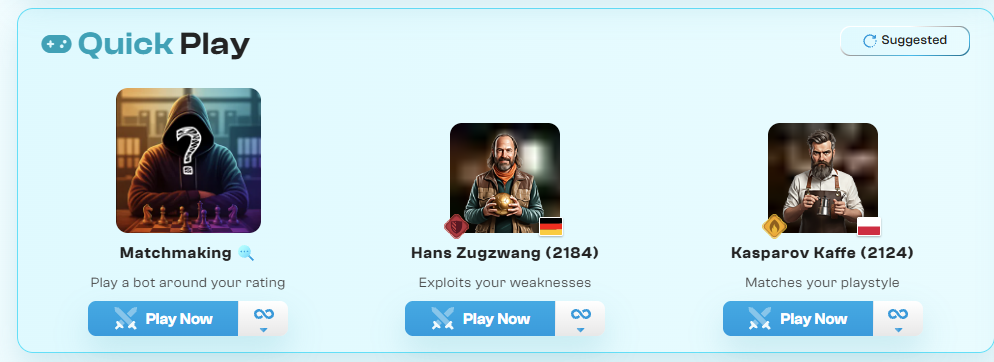
Playing on Chessiverse with the Supreme T2
Here is a platform the manual never mentions, and it might be my favorite way to use this board. Chessiverse is a website built around human-like chess bots. And it is fully compatible with the Supreme T2 through ChessConnect.

If you have not tried Chessiverse, here is the pitch. The site hosts over 1,000 unique bots trained to play like real people at specific rating levels. A 1200 bot actually plays like a 1200 human. It misses the tactics a 1200 would miss. It falls for the traps a 1200 would fall for. That is very different from Chess.com and Lichess bots, which play near-perfect engine moves and then hang a queen at random to hit a target rating. The ratings are calibrated to match Lichess blitz ratings, so you know exactly what you are getting.
Why does this matter for the T2? Because the board has no built-in engine. Chessiverse fills that gap better than anything else I have tried. You get an endless supply of opponents at exactly your level, on a real wooden board, with no waiting for a pairing.
Setup is the same as Chess.com. Install the ChessConnect extension in any Chromium browser, connect the T2 over USB, and open Chessiverse.com. ChessConnect supports the site officially through its API, so the integration is legal and stable. Pick a bot, make your moves on the board, and watch the bot’s replies light up on the LEDs.
One practical tip. Chessiverse games have no clock pressure by default. That makes it perfect for slow, thoughtful practice games on the T2. It has become my go-to for evening training sessions.
Step 5: Chess Computer Modules
If you want the board to play chess without a phone or PC, this is the answer. Set the slide switch to Mini-DIN and connect a Millennium chess computer module with a Mini-DIN cable. Compatible modules include the ChessClassics Element and the Mephisto Phoenix.
Two notes. Be gentle with the Mini-DIN pins. They bend easily. And in this mode, the module powers the board, but the battery does not recharge. Charge separately.
The Phoenix is a serious chess computer, and the T2 becomes its perfect wooden interface. If you already own a module, the T2 is an easy upgrade. If you do not, budget for one only if you really want offline engine play.
Step 6: Save Your Games as PGN
This is my favorite hidden feature, and the manual buries it. The board logs every move from the starting position, all by itself, with no app connected. It stores up to 100 games.
How Games Get Saved
A checkmate saves the game automatically. For any other result, you tell the board who won by placing the kings on the center squares after the game:
- Both kings on white squares (e4 and d5): White wins.
- Kings on d4 and e5: Black wins.
- One king on a white square, one on a black square: Draw.
This is the same convention used in tournament halls, which is a nice touch. The center square LEDs flash to confirm. If pieces occupy those squares, just lift them off first. You do not need to clear the whole board.
Do this before you set up for the next game. If you forget, the result is not recorded.
Using the PGN Tool
Downloading your games requires the free PGN tool from Millennium’s website. Fair warning: it is Windows 10/11 only. Mac and Linux users are out of luck for now. That is a real gap, and I hope Millennium fixes it.
The process:
- Connect the board to your PC via USB, with the slide switch on USB.
- Turn on the board.
- Run the PGN tool. It is a single exe file. No install needed.
- Press the PGN button on the board. The power LED flashes three times, pauses, and repeats.
- Click “Get PGN” in the tool. It scans COM ports and pulls in every stored game.
- Edit the header brackets if you want. Add player names and dates.
- Save the file. You can now import it into Lichess, ChessBase, or any analysis tool.
Transferring games does not erase them from the board. That is a separate step.
Clearing the Board Memory
This one feels like a secret handshake: Press and hold the brightness (DIMM) button.
- While holding it, press and hold the PGN button.
- When the power LED flashes twice, release both.
- Press and hold the brightness button again until the power LED goes out.
- Wait. The LED flashes while the memory erases, then the board restarts. The battery indicator flashing tells you it is done.
Write those steps on a sticky note. You will not remember them.
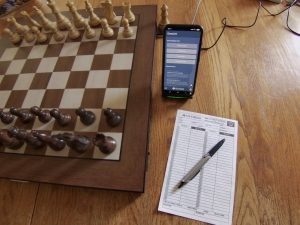
The Tournament Experience at Home
This is the part no spec sheet captures. The Millennium Supreme T2 recreates the feel of tournament chess better than anything I have owned.
Think about what a real tournament gives you. A full-size wooden board. A chess clock at your side. A scoresheet to record your moves. The Supreme T2 delivers all three.
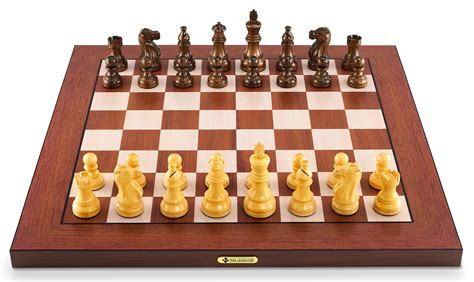
The board
The playing surface is genuine tournament size with 55mm squares. The pieces are real wood with proper weight. When you sit down at this board, it feels like round one at a weekend open. Not a toy. Not a travel set. The real thing.
The clock
You do not need to buy a chess clock. Your tablet or phone becomes one.
Open the ChessLink app and pick 2 Player Mode. Set your time control. Classical, rapid, whatever you like. The app displays two full clocks, just like the digital clocks at a tournament hall. You can set the clock to run automatically when a piece lands. Or use the Press Clock buttons for that satisfying tap after each move.
There is also a focus mode. It shows only the clocks on screen. The position lives on the physical board where it belongs. No screen distractions. Just you, the wood, and the ticking time.
The scoresheet
Here is the best part. The board keeps score for you.
Every move you make is logged automatically from the starting position. When the game ends, the Millennium Supreme T2 stores it. Later, you pull the full game off the board with the PGN tool. It is a perfect digital scoresheet with zero effort during play.
Want the full tournament ritual? Keep a paper scoresheet next to the board and write your moves by hand. I do this sometimes. It slows me down in a good way. But if you forget a move or make an error, the board has your back. The digital record is always there.
Why this matters
Online chess trained me to play fast. Blitz, bullet, rapid. Click, click, click. Somewhere along the way, I stopped playing real chess.
The Millennium Supreme T2 changed that. Setting up the board, starting the clock, and playing a long game brought back something I had lost. I sit with positions now. I calculate. I write my moves down. It has revitalized my interest in slow chess, and I did not see that coming.
If you miss tournament chess, or you have never experienced it, this board gets you as close as you can get without leaving your house.
Full game played on LiChess below:
Maintenance and Battery Replacement
The care list is short. Clean the sealed surface with a slightly damp microfiber cloth. Keep the Millennium Supreme T2 out of direct sunlight to prevent fading. Do not knock it around. Charge it regularly, because lithium batteries wear faster when left empty. Unplug it when you are not using it.
The best long-term feature of this board is the battery. It is a standard CR18650 cell, 3.7V and 3500 mAh, available at any decent electronics shop. When the runtime drops in a few years, you buy a new cell for a few dollars and swap it yourself. Unscrew the plastic button housing, lift it out carefully, swap the cell, and keep the temperature sensor cable close to the new battery.
Compare that to sealed boards where a dead battery means a dead product. Millennium got this right. Note that battery replacement is not covered by the warranty, but registered boards get three years of coverage on everything else.
What I Like About the Millennium Supreme T2
The build quality is real. This is a proper wooden tournament board with weighted Staunton pieces. It looks like furniture, not a gadget. Owners consistently praise the look and feel, and I agree.
Truly wireless. No ChessLink module, no external battery pack, no cables during play. Over 15 hours per charge is more than honest. I went weeks between charges.
Piece recognition that just works. RFID at 48 scans per second means the board never lags behind your hands. Every piece is individually identified, so setup errors get caught immediately.
The open ecosystem. Millennium publishes its protocol instead of locking you into one app. That is why Lucas Chess, HIARCS, Fritz, ChessConnect, and community projects all support it. Small hardware companies come and go. An open protocol means this board stays useful either way.
The replaceable battery. Worth repeating. This board is built to outlast its own battery.
What Could Be Better
The PGN tool is Windows only. In 2026, a Mac version should exist.
Small buttons. Functional, but not up to the standard of the rest of the board.
No native Chess.com path. Not Millennium’s fault, since Chess.com offers no open board API. But the ChessConnect workaround is something buyers should know about before purchase, not after.
Final Verdict
Rating: 4.8 out of 5
The Millennium Supreme T2 is the electronic chessboard I reach for every day. Setup takes minutes once you know the two traps: the slide switch position for charging, and the Android location permission. The game recording feature is quietly brilliant. The battery design shows a company thinking about the long haul.
It loses two tenths of a star for the Windows-only PGN tool, and the lack of any standalone play. If those do not bother you, this is the best wooden e-board on the market right now.
The Millennium Supreme T2 can be purchased at the Chesshouse, here.
FAQ
Does the Millennium Supreme T2 have a built-in chess engine? No. The board has no internal engine. You play through the ChessLink app, PC software like ChessConnect or Fritz, online platforms, or an attached chess computer module like the Mephisto Phoenix.
Does the Supreme T2 work with Chess.com? Not natively. Chess.com has no open board API. Use the ChessConnect Chrome extension with a USB connection to play on Chess.com from a computer.
Does the Supreme T2 work with Lichess? Yes. Connect via Bluetooth with the free ChessLink app and a Lichess API token. You can play casual games, rated games, engines, and even Arena and Swiss tournaments.
How long does the battery last? Over 15 hours of play per charge. A full charge takes about 6 hours. The battery is a standard CR18650 cell you can replace yourself.
Does it work with iPhone and Mac? Yes, the ChessLink app runs on iOS and Android. On Mac, HIARCS Chess Explorer supports the board. The PGN download tool, however, is Windows only.
Why won’t my board connect over Bluetooth on Android? Enable location sharing. Android requires location permission for Bluetooth Low Energy connections. Also check that the board is not already connected to another device.